Introduction
Have you ever wondered how to transform a classic dessert into something truly unforgettable? As your go-to culinary content creator, I’m thrilled to share this delightful recipe for Oreo Dirt Cake with six delicious twists that will leave everyone asking for seconds. Whether you’re hosting a party, looking for a fun activity to do with the kids, or simply craving a chocolatey treat, this recipe is here to satisfy all your sweet tooth needs.
What makes this Oreo Dirt Cake so special? It’s not just about its rich, creamy layers and playful presentation—it’s also about how versatile it can be. From adding gummy worms for a whimsical touch to experimenting with unique flavors like caramel or strawberry, the possibilities are endless. Plus, it’s an easy dessert that requires minimal effort but delivers maximum wow-factor. Who wouldn’t love that?
So grab your ingredients and let’s dive in together. By the end of this guide, you’ll have mastered the art of creating a show-stopping dessert while learning some pro tips along the way. Ready to get started? Let’s make this Oreo Dirt Cake adventure one to remember!
Table of Contents
Ingredients
Before we begin assembling our Oreo Dirt Cake, gather these simple yet essential ingredients. This list ensures you have everything you need to create a deliciously decadent dessert.
- 24 Oreo cookies (plus extra for garnish)
- 3 cups cold milk
- 1 box instant chocolate pudding mix (or your preferred flavor)
- 2 cups heavy whipping cream
- 1/2 cup powdered sugar
- Gummy worms (optional, for added fun)
- Chocolate shavings (for decoration)
- Fresh fruit slices (such as strawberries or bananas, optional)
If you’re feeling adventurous, consider swapping out the chocolate pudding for vanilla or even peanut butter flavors. The beauty of this recipe lies in its flexibility—Lily Hanna loves experimenting with different combinations to keep things exciting!
| Ingredient Quantity Breakdown |
| Oreos: 24 |
| Milk: 3 cups |
| Pudding Mix: 1 box |
| Whipping Cream: 2 cups |
| Powdered Sugar: 1/2 cup |
| Gummy Worms: Optional |
Now that we’ve got our ingredients ready, let’s move on to the fun part: assembling the cake!
Step-by-Step Instructions
Follow these easy steps to create a stunning Oreo Dirt Cake. Each stage is designed to ensure success, no matter your baking experience.
Step 1: Prepare the Pudding Base
In a large mixing bowl, whisk together the cold milk and instant pudding mix until smooth. Allow the mixture to thicken for about 5 minutes. While waiting, prepare the whipped cream.
Step 2: Whip Up Some Cream
Whip the heavy cream and powdered sugar together using a stand mixer or hand-held whisk until it reaches stiff peaks. This light and airy topping will complement the rich pudding perfectly.
Step 3: Crush Those Oreos
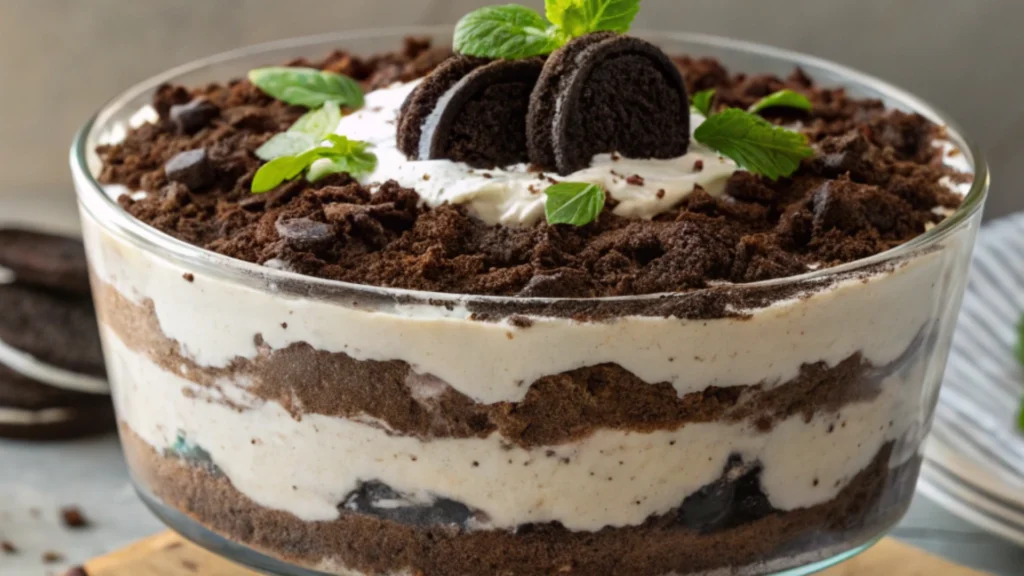
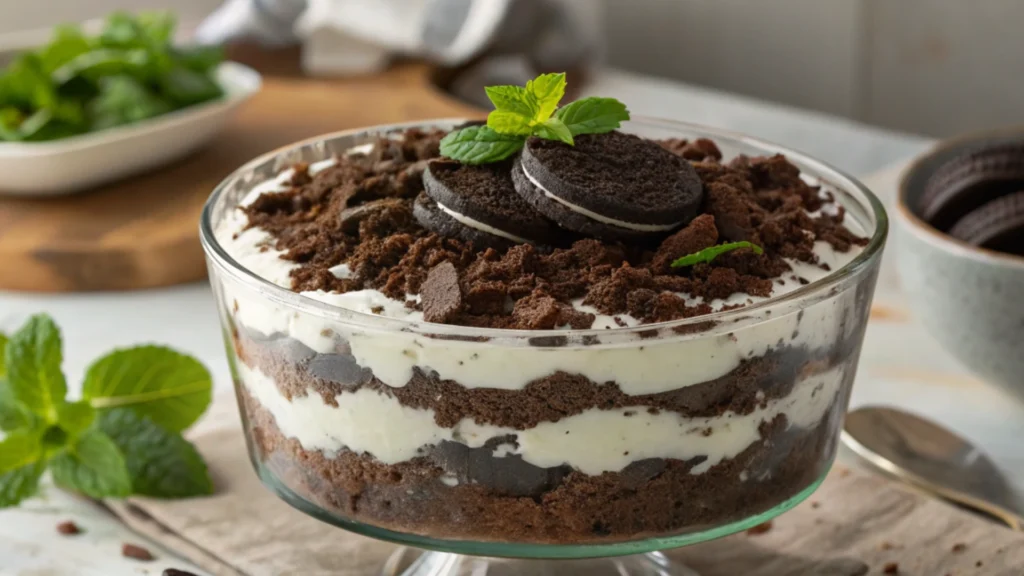
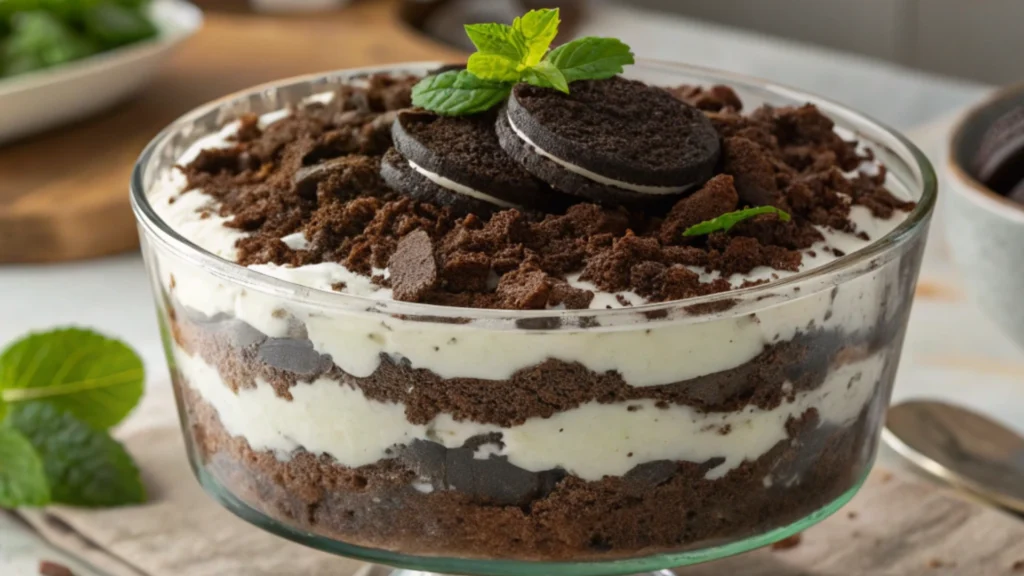
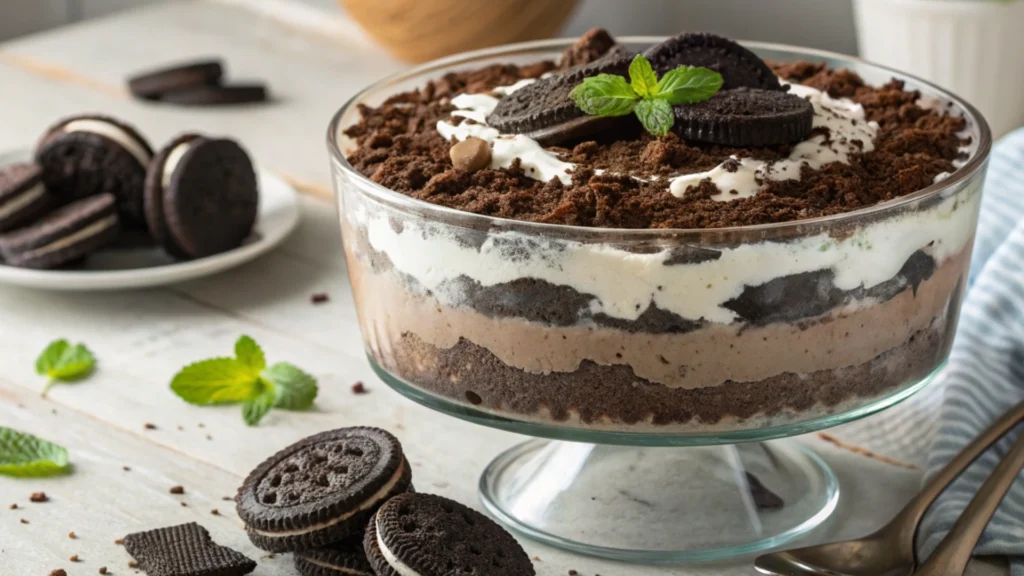
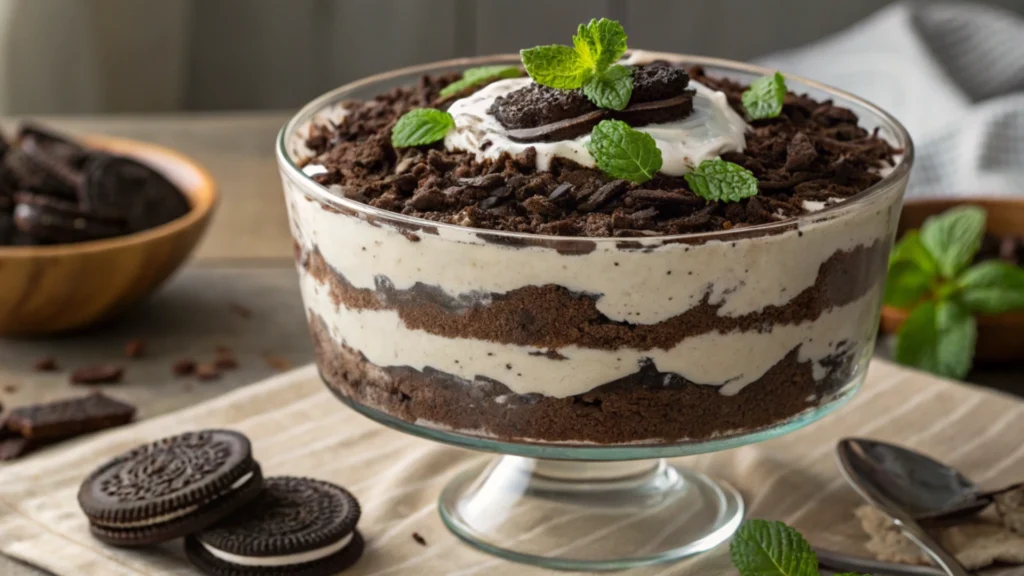
Crush 18 of the Oreo cookies into fine crumbs using a food processor or sealable bag and rolling pin. Set aside 6 whole Oreos for decorating later. These crushed cookies will serve as the “dirt” base for your cake.
Step 4: Layer It Up
In a trifle dish or clear glass container, start layering your ingredients:
- Start by adding a light layer of pudding at the base.
- Add a layer of crushed Oreos.
- Repeat the process until all ingredients are used up, finishing with a final layer of pudding on top.
Step 5: Chill Time
Refrigerate the assembled cake for at least 2 hours (or overnight) to allow the flavors to meld together and the pudding to set firmly.
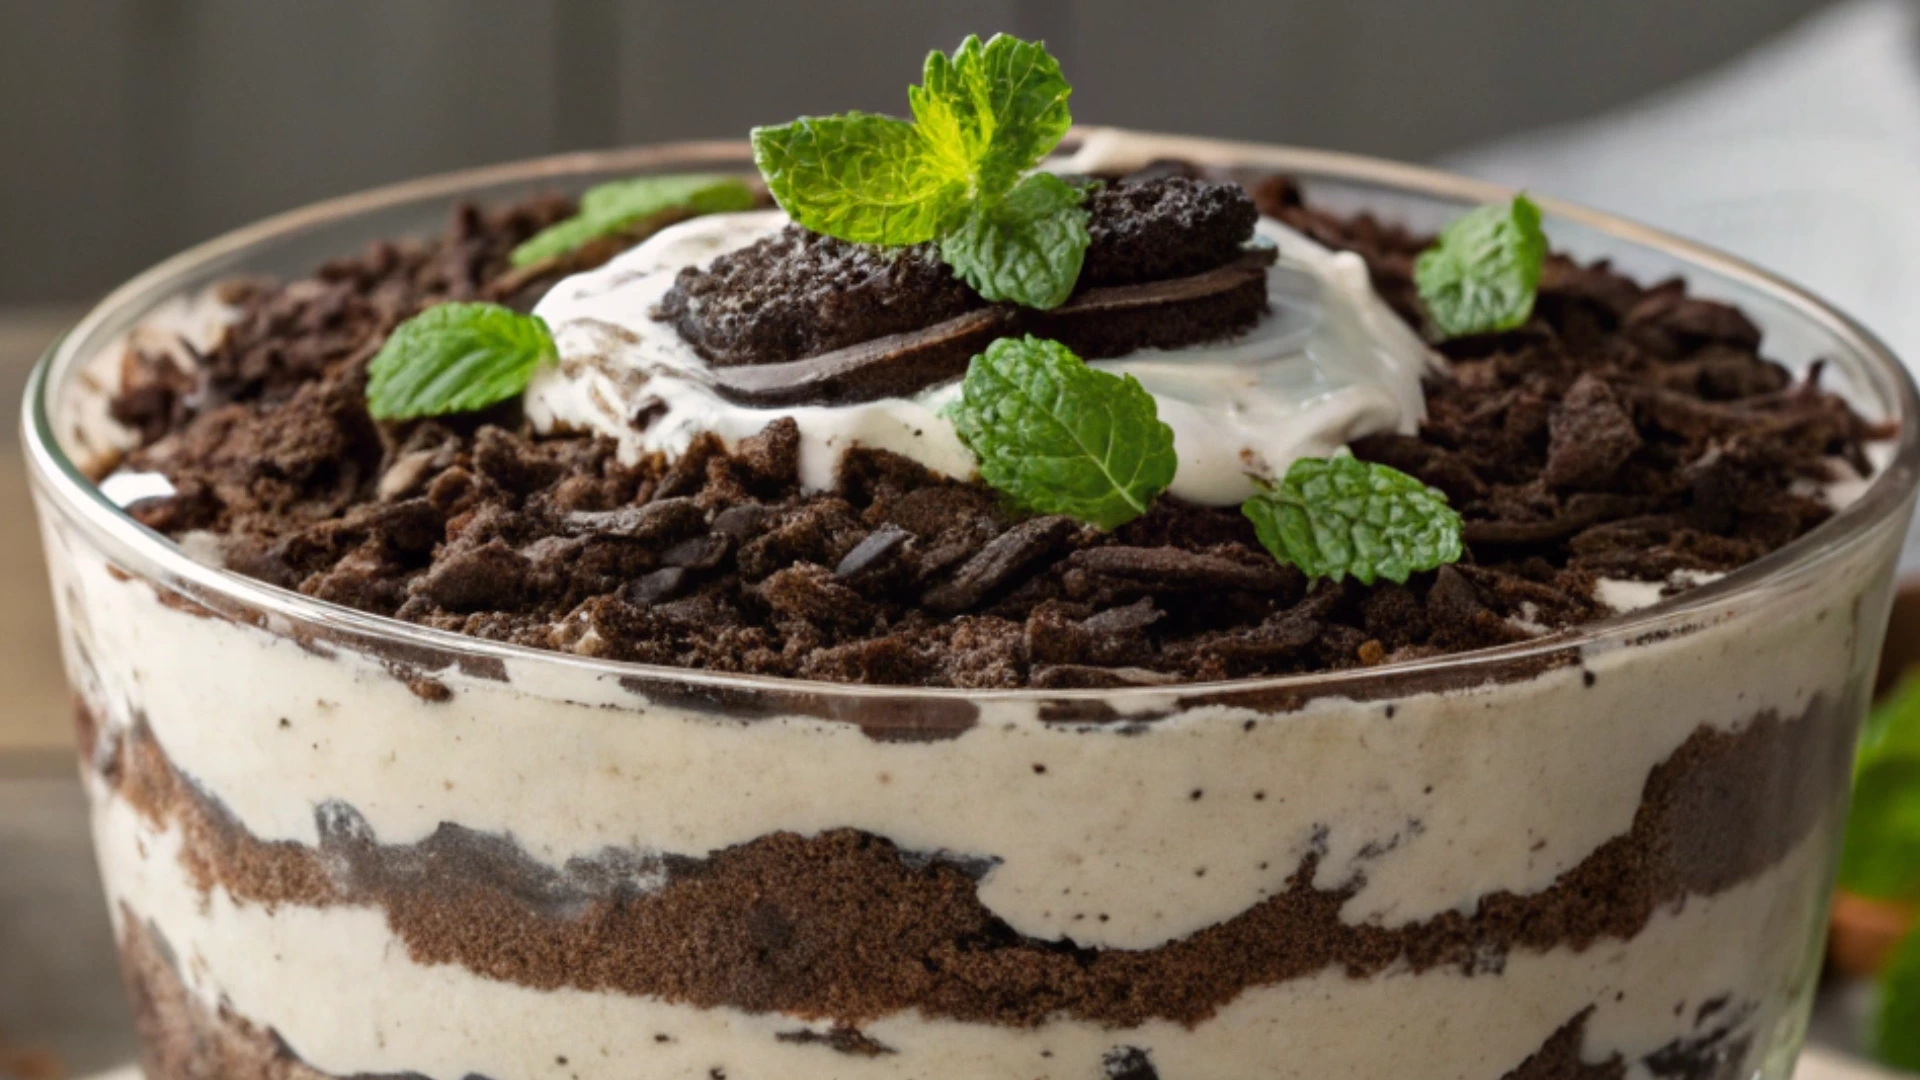
Step 6: Decorate and Serve
Once chilled, decorate your cake with chocolate shavings, gummy worms, fresh fruit slices, and the reserved whole Oreos. For an extra touch, drizzle caramel sauce over the top if desired.
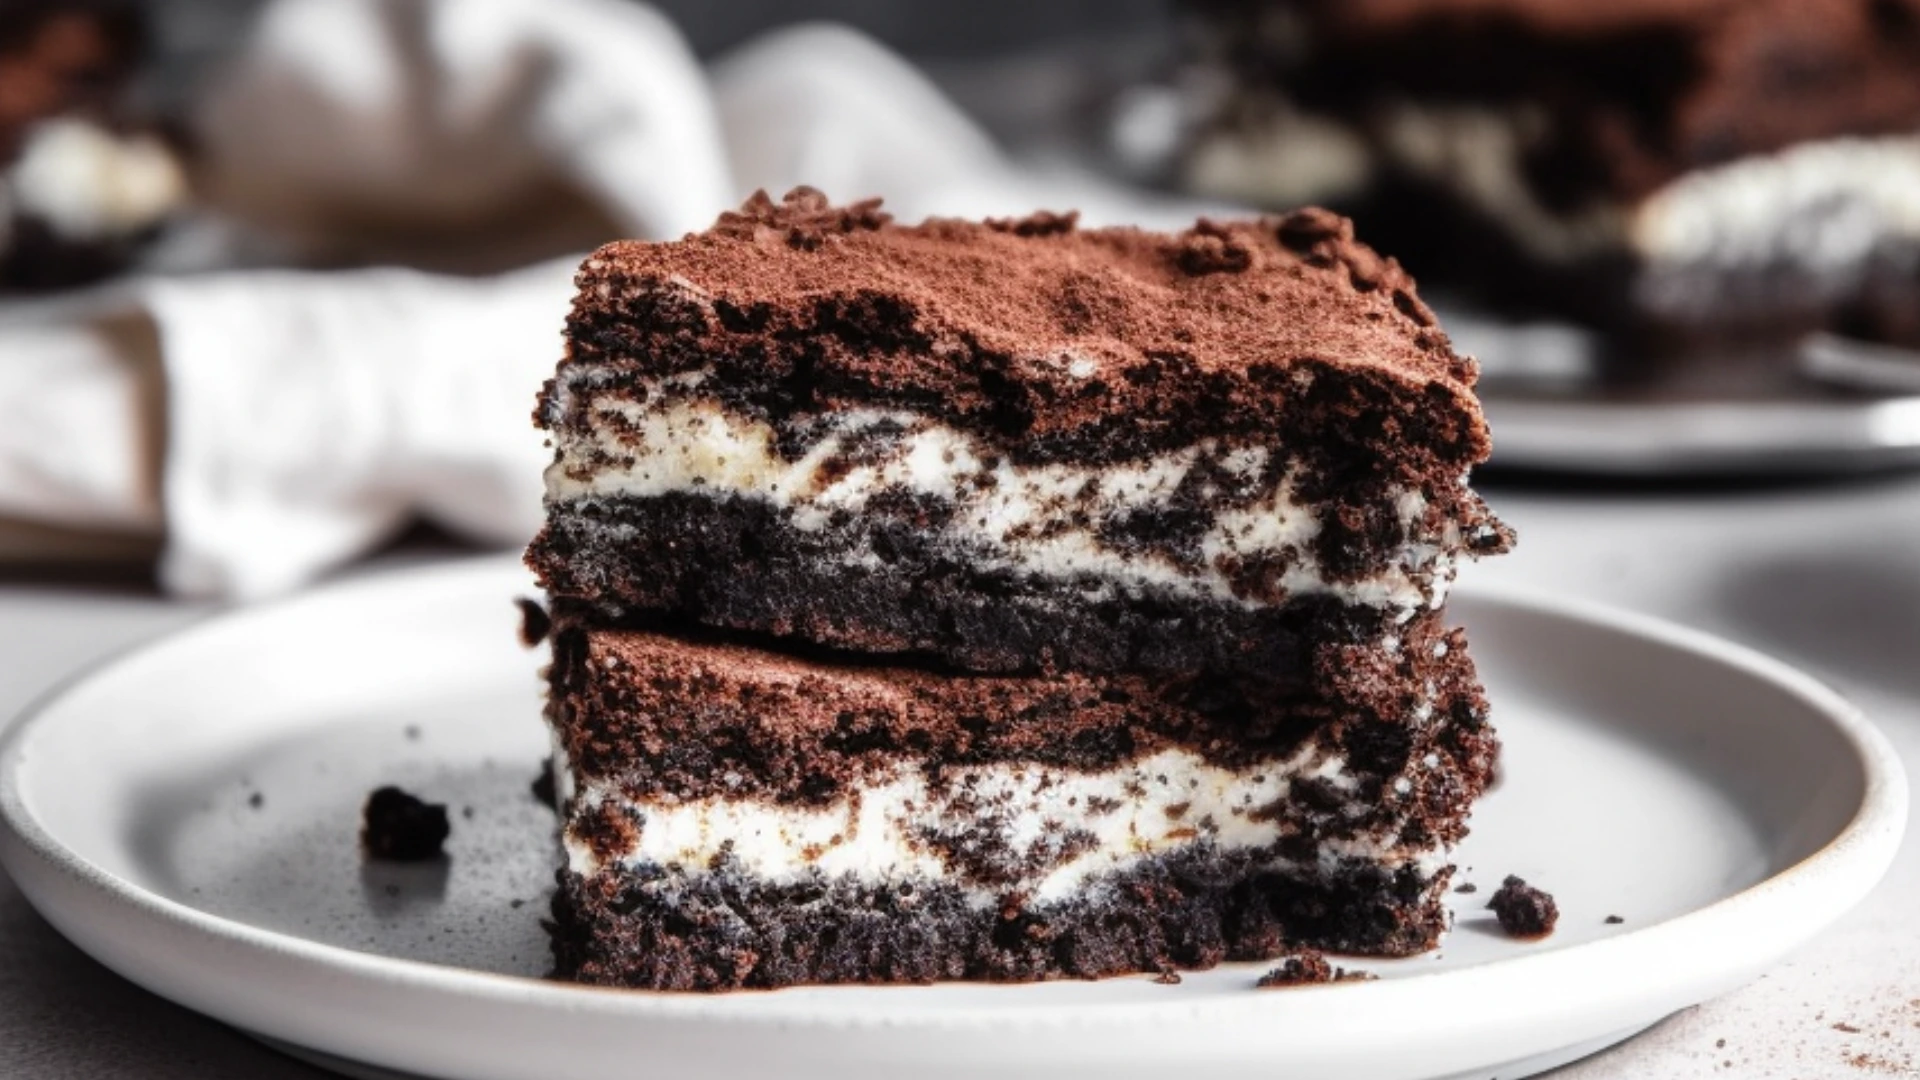
There you have it—a beautiful, customizable Oreo Dirt Cake ready to impress your guests. Chef Lily Hanna swears by this method for achieving perfectly balanced layers every time.
Pro Tips and Variations
Here are some expert tips and creative ideas to elevate your Oreo Dirt Cake game:
- Add Caramel Drizzle : A sticky caramel drizzle adds sweetness and texture contrast. Simply heat store-bought caramel sauce in the microwave for easier pouring.
- Experiment with Flavors : Swap the chocolate pudding for vanilla, coconut, or even pumpkin spice for seasonal flair.
- Make It Gluten-Free : Use gluten-free Oreos and check the pudding mix label for gluten-free certification.
- Individual Portions : Serve the dirt cake in small mason jars for a cute presentation perfect for parties.
- Fruit Infusion : Incorporate diced mangoes, kiwis, or berries into the layers for a fruity twist.
Chef Lily Hanna always encourages her followers to experiment with their recipes. After all, cooking should be fun and personal!
Serving Suggestions
When it comes to serving your Oreo Dirt Cake, the options are limitless. Here are a few ideas to inspire you:
- Party Platter : Arrange the cake centerpiece on a decorative platter surrounded by mini desserts for a festive spread.
- Individual Servings : Portion the cake into small glasses or bowls for a more intimate setting.
- Themed Desserts : Pair the cake with themed drinks like hot cocoa or milkshakes for a cohesive dessert experience.
For an extra-special touch, serve the cake alongside freshly brewed coffee or tea. It’s the perfect way to wind down after a long day—or celebrate a special occasion.
Conclusion
Congratulations! You’ve now created a memorable dessert that’s sure to delight family and friends alike. With its quick preparation time, customizable flavors, and impressive presentation, this Oreo Dirt Cake is a keeper. Chef Lily Hanna hopes you enjoyed every step of this baking journey and encourages you to share your creations with others.
Remember, cooking is about creativity and joy. So don’t hesitate to add your own personal touches to make this recipe uniquely yours. Happy baking!
FAQs
Q: Is it possible to prepare this cake in advance?
A: Absolutely! In fact, refrigerating the cake overnight enhances its flavor and texture. To keep it fresh and moist, store it in a sealed container.
Q: What can I use instead of gummy worms?
A: If you prefer, skip the gummy worms entirely or substitute them with candy ants, jelly beans, or other fun toppings.
Q: How many servings does this recipe yield?
A: Depending on portion size, this recipe serves approximately 8–10 people. Adjust ingredient quantities accordingly for larger gatherings.
Q: Is there a dairy-free option for the whipped cream?
A: Yes, you can use dairy-free whipped cream alternatives available at most grocery stores. Be sure to check labels for allergens.