Introduction
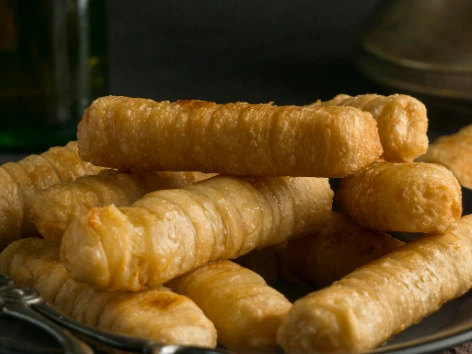
Who doesn’t love a snack that’s crispy on the outside, gooey on the inside, and packed with flavor? If you’re anything like me, cheesy taco sticks might just become your new go-to appetizer or party favorite. As Lily Hanna, a passionate culinary content creator, I’m thrilled to share this game-changing recipe for cheesy taco sticks —a dish so irresistible, it will leave your guests begging for seconds (and thirds).
But here’s the secret: these aren’t your ordinary snacks. With a few simple tweaks and tricks, you can elevate them to an unforgettable level of deliciousness. Whether you’re baking or frying, experimenting with different cheese fillings, or adding unique taco seasoning blends, the possibilities are endless. Plus, they’re surprisingly easy to make, making them perfect for busy weeknights or special occasions alike.
Ready to discover how to create 10x better cheesy taco sticks that will have everyone raving? Let’s dive in!
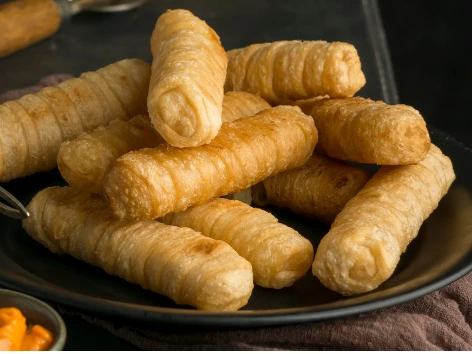
Table of Contents
Ingredients
For this recipe, you’ll need just a handful of ingredients. Most of these are pantry staples, so you probably already have everything you need! Here’s what goes into these irresistible cheesy taco sticks:
- 8 small flour tortillas (or whole-grain tortillas for a healthier option)
- 2 cups shredded cheese (cheddar, Monterey Jack, or a mix works well)
- 2 tablespoons taco seasoning (store-bought or homemade)
- 1/4 cup sour cream (optional, for added creaminess)
- 1 tablespoon olive oil (for brushing)
- Salt and pepper (to taste)
- Optional toppings : diced tomatoes, chopped cilantro, sliced jalapeños, or guacamole
| Ingredient | Purpose |
|---|---|
| Flour Tortillas | The base for your crunchy taco sticks. |
| Shredded Cheese | Provides the gooey, melty center. |
| Taco Seasoning | Adds bold, authentic Mexican flavors. |
| Olive Oil | Helps achieve that golden, crispy texture. |
Step-by-Step Instructions
Now that you’ve gathered your ingredients, let’s walk through the process step by step. These instructions are designed to be clear and concise, ensuring even beginners can master this recipe.
Prepare Your Ingredients
Start by laying out all your ingredients on the counter. Mix the shredded cheese with the taco seasoning in a bowl. If you’d like a creamier filling, stir in the sour cream at this stage. This not only enhances the flavor but also makes the filling easier to spread.
Roll the Taco Sticks
Place one tortilla on a flat surface. Spread about 1/4 cup of the cheese mixture evenly across the tortilla, leaving a small border around the edges. Roll the tortilla tightly, tucking in the sides as you go to form a stick. Repeat with the remaining tortillas and cheese mixture.
Seal the Edges
To ensure the rolls stay closed during cooking, lightly brush the edges of each rolled tortilla with water or olive oil. This will help seal them shut and prevent the filling from spilling out.
Coat with Oil
Brush each rolled taco stick generously with olive oil. This step is crucial for achieving that crispy, golden exterior. You can also sprinkle a pinch of salt over the sticks for extra flavor.
Bake or Fry
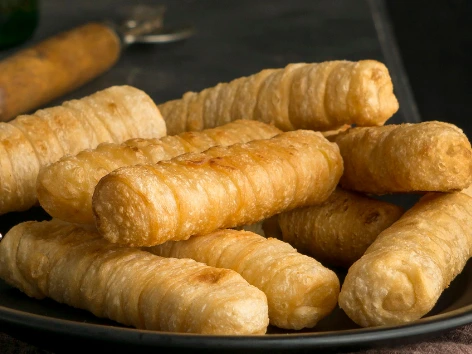
Preheat your oven to 375°F (190°C). Place the coated taco sticks on a baking sheet lined with parchment paper. Bake for 15-20 minutes, flipping halfway through, until golden brown and crispy. For a quicker method, you can fry the sticks in hot oil for 2-3 minutes per side until crispy.
Cool and Serve
Once cooked, remove the taco sticks from the oven or fryer and let them cool for a few minutes. This allows the cheese to set slightly, making the sticks easier to handle. Slice each stick into bite-sized pieces if desired.
Pro Tips and Variations
Here are some expert tips and creative variations to take your cheesy taco sticks to the next level:
- Use Different Cheeses : Experiment with cheeses like pepper jack for a spicy kick or mozzarella for extra stretchiness.
- Add Protein : Incorporate cooked ground beef, chicken, or beans into the cheese mixture for a heartier snack.
- Make It Spicy : Add diced jalapeños or red pepper flakes to the filling for a fiery twist.
- Try Baked vs Fried : While both methods work well, baking is healthier, while frying gives a crispier texture. Choose based on your preference!
- Whole-Grain Option : Swap regular tortillas for whole-grain ones to boost the nutritional value of your snack.
Lily Hanna loves experimenting with variations, and she encourages you to do the same. After all, cooking should be fun and personal!
Serving Suggestions
These cheesy taco sticks are incredibly versatile, making them suitable for any occasion. Here are some ideas for serving them:
- As an Appetizer : Pair them with classic dips like salsa, guacamole, or sour cream-based dip for a crowd-pleasing start to any meal.
- For Kids’ Lunches : Pack them in lunchboxes with a side of ranch dressing for dipping. They’re sure to be a hit!
- At Parties : Arrange them on a platter with other finger foods like nachos or mini tacos for a themed snack spread.
- With Beverages : Serve alongside cold drinks like margaritas or lemonade for a refreshing contrast.
Lily Hanna suggests getting creative with presentation to make your snacks stand out. A beautifully arranged plate can turn a simple dish into something extraordinary.
FAQs
Can I freeze cheesy taco sticks?
A: Absolutely! Once cooled, wrap the sticks individually in plastic wrap and store them in an airtight container in the freezer. Reheat in the oven or microwave when ready to serve.
What type of cheese works best?
A: Cheddar and Monterey Jack are popular choices due to their meltability and flavor. However, feel free to experiment with other cheeses like pepper jack or mozzarella.
How long do they stay fresh?
A: When stored in an airtight container, cheesy taco sticks can last up to 3 days in the refrigerator. Reheat before serving for optimal texture.
Can I make them gluten-free?
A: Yes, simply use gluten-free tortillas instead of regular ones. The rest of the recipe remains the same!
Conclusion
There you have it—a foolproof recipe for cheesy taco sticks that’s sure to impress anyone who tries it. From the crispy texture to the rich, flavorful filling, every bite is pure satisfaction. As Lily Hanna always says, “Cooking is about creating memories, and these taco sticks are guaranteed to leave a lasting impression.” cheesy taco sticks